⚠️ Warning! this installation requires working at height. Ensure the install is only completed by a person who is competent at working at height.
ℹ️ Make a note of the serial numbers of all equipment before commencing the install. Serial numbers are in the format of a long upper-case hexadecimal number prior to the ’ / ‘ and 3 digits, these are a reference to production dates and not part of the serial number itself and should be disregarded.
Check you have the correct Equipment
- Your SimRush Hardware Base Pack.
In the example is shown below is a “SimRush Pro WiFi – 18” but this will vary depending on the model you have purchased, check your order and dispatch note. I most cases it will consist of 2 hardware devices: the external “SimRush ODU” and the internal “SimRush Controller”

- A Self-installation pack containing (colours may vary) :
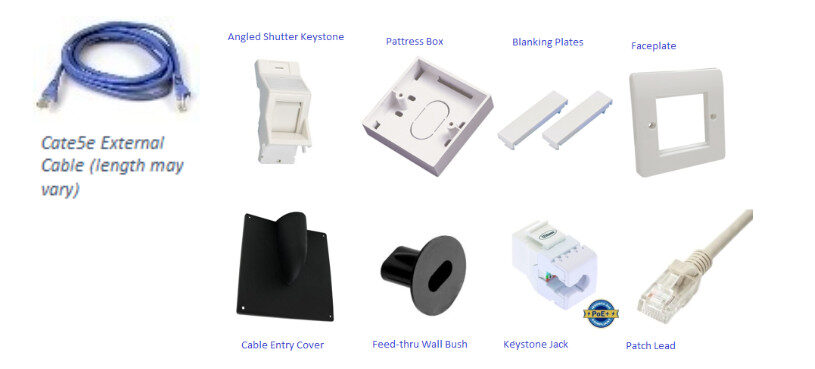
- A live data SIM. This must be active and have a minimum of 2Gb of data for testing.
- Additional mounting bracketry (not included as standard) see our website for examples https://www.simrush.com/installation-guide/products/mountings/
Test the ODU
- Fit your SIM into the SimRush ODU. Ensure the SIM is sprung into place properly.
Note that the SIM is inserted with cut corner first on the top right with metal contacts facing you.
In most cases, the SIM will be pre-installed in the unit.

- Insert patch cable into the ODU as shown below. Ensure the cable is “clicked” into place and the cable has the gland round the bottom to ensure the seal when the cover is replaced
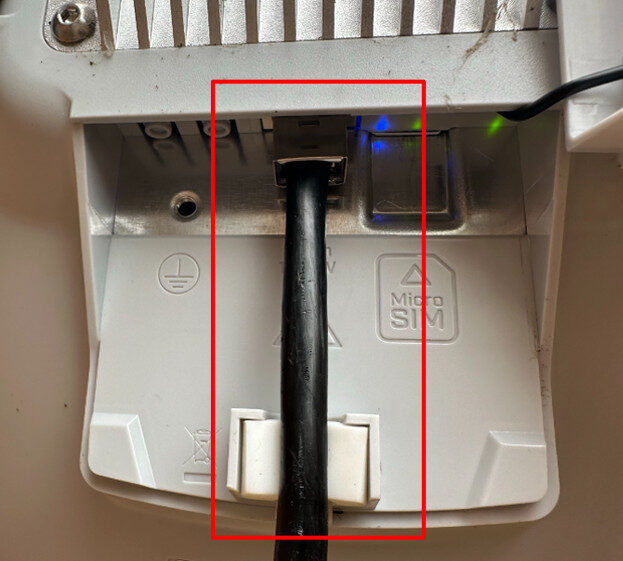
⚠️ If using your own cable, then DO NOT USE a booted RJ45 Ethernet plug as the booting may not fit inside the case when the lid is closed causing stress to the circuit board connector.
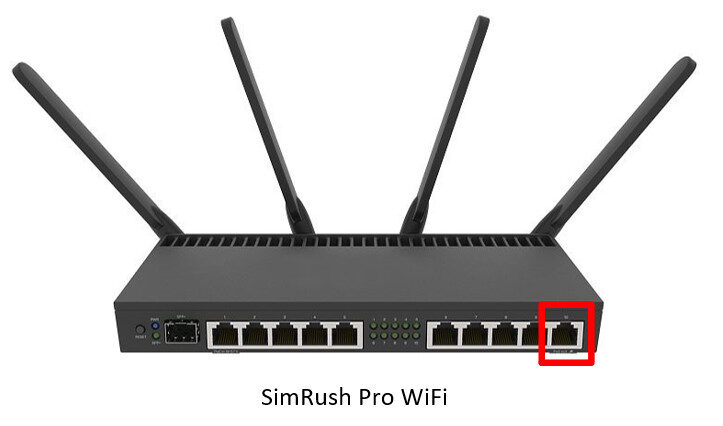
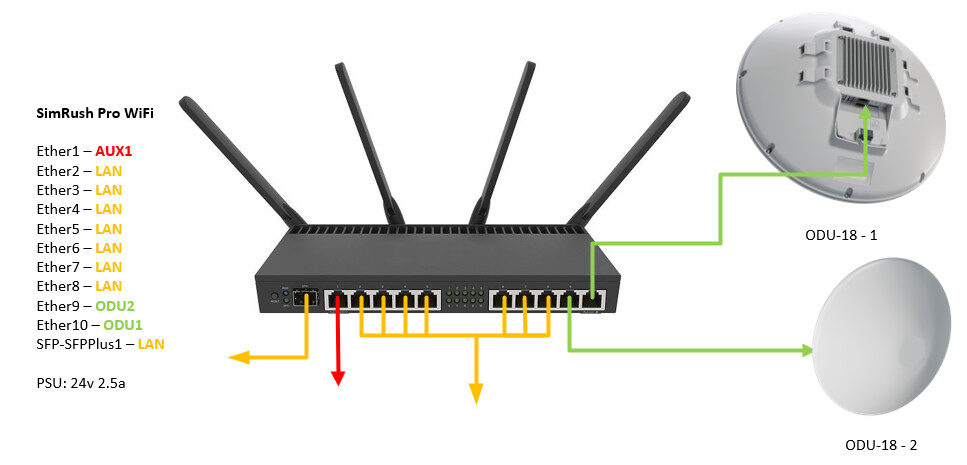
- Insert other end of the patch cable into Port 5 of the SimRush Controller as shown below
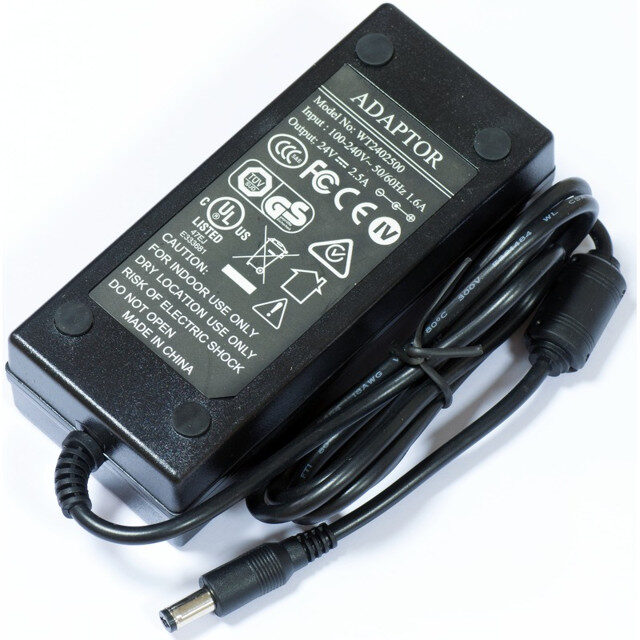
- Power on the Controller using the power supply provided.
This should provide a minimum of 24v DC / 2.5 amps.
- Verify the ODU is receiving a signal. You will see green lights inside and on the rear of the ODU under the cover above the SIM slot.
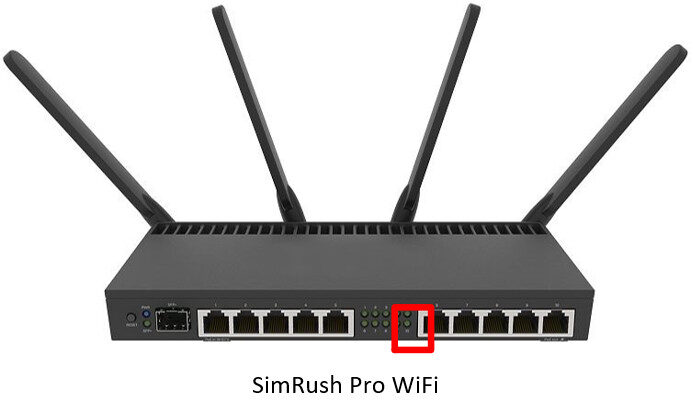
On the indoor controller, Ethernet Port 10 should now indicate a green colour to show power / data is being delivered.
- If your SimRush model has built in WiFi, a WiFi signal should now be available, SSID: “SimRush-xxxxxx”
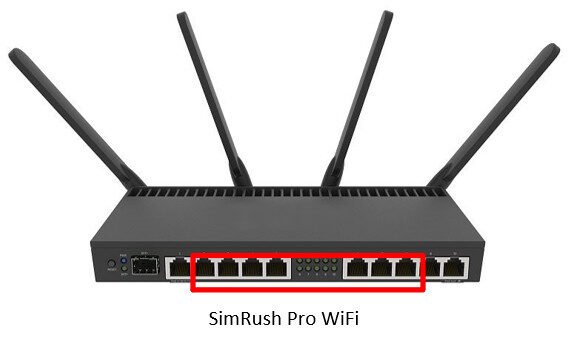
Connect any device to the SimRush WiFi for tuning and testing. The default WiFi key is your Controller Serial number which can be found on the base of the SimRush Controller. This password is case sensitive, all upper-case, and does not include any digits beyond the “/ ###” at the end. Only use the 12-digit hexadecimal code (e.g. A1B2C3D4E5F6). - If your SimRush Model does not have WiFi built in, connect an Ethernet cable from Ethernet Port No.2-8* to a PC/Laptop. Your computer will receive and IP address automatically from the SimRush controller via DHCP. * Follow Controller quick start guide for port layout.
- Once you have a connection, you should be able to browse or ‘ping’ to IP address http://172.16.1.1/
This is the IP address of the ODU, if this test is successful you’re ready for the next step.
If you cannot get power to the ODU, check the cabling is correctly & fully inserted into the ports on both SimRush devices and the main power supply to the controller is turned on. If there is still no power to either device, please contact your supplier. - Disconnect the patch cable from the Controller and the ODU and set the items aside for later.
Determine the external location for the SimRush ODU
Plan the optimum location for your Outdoor Unit to be placed. The location you choose for your outdoor device can have a huge impact on its performance. To ensure the best speeds possible ensure:
The ODU is facing the closest transmitter of your SIM’s carrier.
Your chosen location has as much height as possible.
Clear line of sight between ODU and transmitter where available. Avoid Buildings, walls, rooflines, metal, double glazing where possible. Consider signal height, reflections & obstructions.
If you have a smart phone you can download the OpenSignal App to identify the direction of the nearest mast with the carrier you are using (You must be using a phone with the same data carrier as the Sim in the ODU)
Android – Download the app from Google Play Store “OpenSignal”
Opensignal – 5G, 4G Speed Test – Apps on Google Play
iOS – Download the app from Apple Store “OpenSignal”
Opensignal Speed Test Ad Free App – App Store
Determine the Internal location for the SimRush Controller and plan the cable run between the external and internal devices
- The SimRush Controller needs to be placed near to a power outlet.
- We suggest you locate the SimRush Controller in a living room, office or other space where you will want use the WiFi mostly. If you want to extend your WiFi coverage later you can purchase additional SimRush devices to do that.
- Plan the cable route from the ODU to the Controller, the maximum route cannot exceed 40 meters in cable length. For cable runs of 40-90 metres please see our support pages for further information.
ℹ️ Remember: the cat5e cable will need to pass from the outside of the premises to the inside so you will need to locate or create a suitable entry point into the building for the cat5e cable to pass through. (If you need to drill a hole for the cable to pass through ensure it is 10mm diameter minimum.)
Install the ODU fixing point
⚠️ Warning! the installation requires working at height. Ensure the install is only completed by a person who is competent working at height.
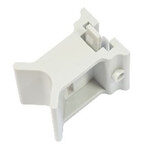
The supplied ODU bracket can be used to mount the ODU to the fixing location which is a pole. If a flat surface mount is required, a mounting adapter should be ordered separately
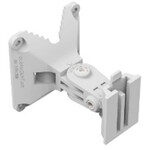
Mount the ODU
Plug in the pre-terminated end of the supplied cat5e cable into the ETH1 port in the ODU. Carefully close the door hatch ensuring it clicks shut and is closed correctly as shown below. Do not force it!
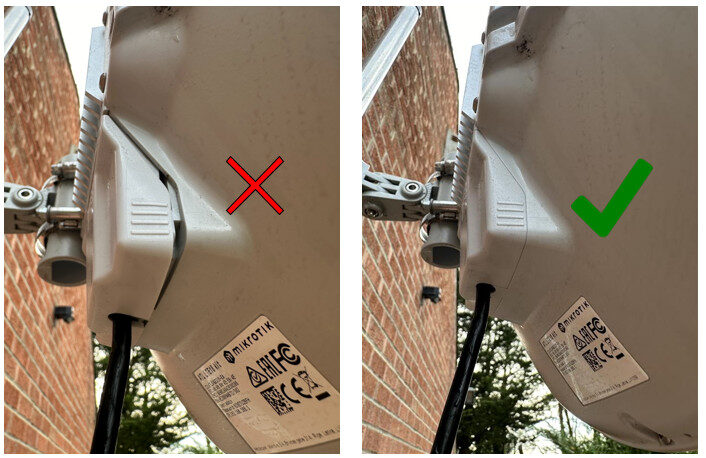
Mounting to a Pole
The ODU-18 can be mounted directly to a pole using the V shaped grooves on the side of the unit, a pair of Jubilee clips (Hose Clamp) are threaded through to securely mount the unit directly to a pole
Alternatively you can mount the ODU using a QuickMount bracket to the pole.
Ensure the mounting bracket is fixed to the pole using the jubilee clip provided with the clip on the upper side as indicated below. Do not fully tighten the jubilee clip at this stage, allow a little movement so that the bracket can be moved for directional alignment. It can be fully tightened once the ODU has been positioned to receive the optimum signal achievable.
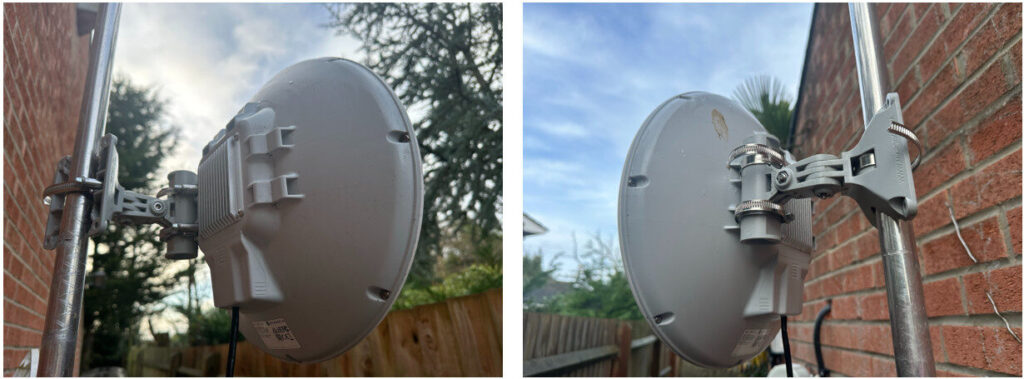
Right: ODU-18 mounted to a QuickMount to give the unit “Tilt” for alignment
Using A Mounting Adapter to install on a flat surface
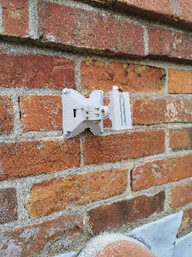
- Mark out placement of holes for screws on suitable flat surface and drill holes in marked location
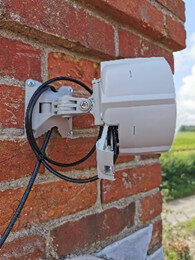
- Fix mounting bracket to flat surface using screws provided
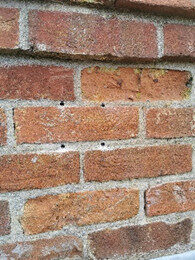
Fix External Cable Run
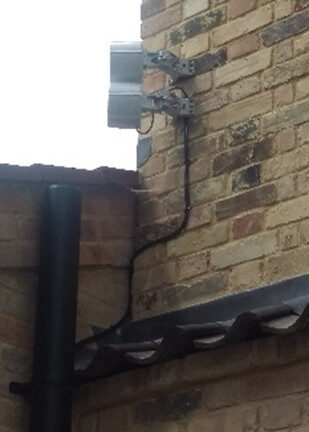
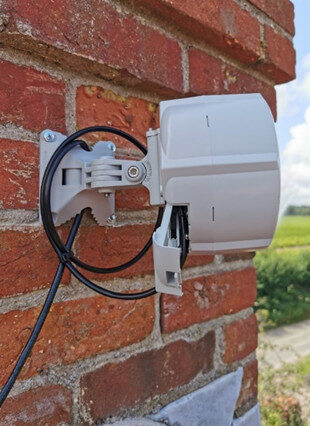
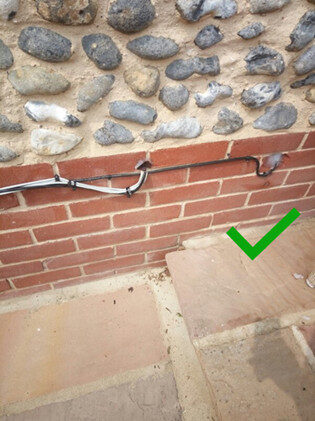
- Ensure there is a small coil of excess cable remaining near to the ODU to create a ‘drip loop’ as shown.
- Secure the cable from the end of the drip loop section along / down the building to the external entry point. we recommend fixing the cable every 45cm.
- Insert the un-terminated end of the cat5e cable through the external entry point and go inside the premises to pull it through.
- Before securing the last external cable fixing, make sure you have a ‘drip loop’ to prevent water ingress.
Fix Internal Cable Run
- Attach the pattress box to the wall over the hole where the cat5e cable enters the premises, or if the cabling requirement extends further into the property use standard cable clips to run the cable around the walls to the desired location and enter the Pattress box from the side or base, removing cable entry blanks on the Pattress box as desired.
- Cut the cable to the desired length, be sure to leave enough cable so that you can strip back the outer sheath without damaging the internal cores.
- Use the tool-less Keystone Jack to terminate the cable.
- Attach the shutter any blanking plates as required to faceplate.
- Attach the keystone jack to the shutter
- Screw faceplate to pattress box attached to the wall to create your new socket.
- Connect your ethernet patch lead into the new socket.
Connecting the SimRush ODU to the SimRush Controller
- Connect the other end of the ethernet patch lead into port 5 of the Controller and check the Ethernet port 5 light is orange.
DO NOT USE ANY OTHER PORT OR THE HARDWARE WILL NOT WORK ! - Connect any device to the SimRush WiFi for testing. The default WiFi key is your Controller Serial number which can be found on the base of the SimRush Controller. The upper-case hexadecimal serial number does not include the “/ ###” digits at the end. Only use the long serial number code.
- If you do not wish to use WiFi you can connect your device with a cable using Ethernet ports 2, 3 or 4
- Wait two minutes.
- Verify the connection is live– browse to Speedtest by Ookla – The Global Broadband Speed Test and do a speedtest.
Align the ODU
First Alignment
- Log onto the ODU via a web browser to determine the signal strength. http://172.16.1.1
The values on the webpage for best results will be under the SINR and RSRP values
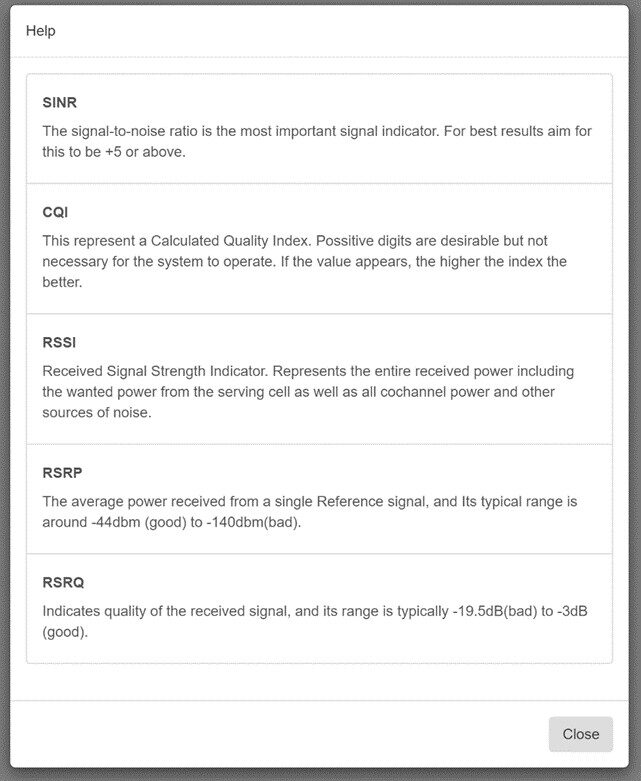
SINR: Signal to Noise Ratio – you are looking for a large + value e.g. 20db
RSRP: Reference Signal Received Power – Your looking for a low Negative number e.g. -64db - Rotate 5 degrees then wait 5 seconds each time for unit to display new values.
Fine Alignment
The directional antenna in the SimRush ODU is highly sensitive and minor adjustments in its position can make a huge impact on its performance. To assist in selecting the fine optimal alignment of the direction of the SimRush ODU you can use our alignment help webpage.
ℹ️ Note: You can only access this page when both SimRush devices are powered on using the network provided by the SimRush Controller. If you wish to use the alignment page then do not secure your ODU in its final position until you have completed these steps
Logging Into the ODU
Ensure you have completed “Connect to the SimRush WiFi” section above, or you have a laptop connected to the Local network via Ethernet cable.
Once the hardware is plugged in and turned on, browse to: http://172.16.1.1/
If you have multiple ODU’s please see table below
| SimRush ODU | |
| SimRush ODU Name | SimRush ODU address |
| ODU 1 | http://172.16.1.1/ |
| ODU 2 | http://172.16.2.1/ |
| ODU 3 | http://172.16.3.1/ |
| ODU 4 | http://172.16.4.1/ |
| ODU 5 | http://172.16.5.1/ |
| ODU 6 | http://172.16.6.1/ |
Once you browse to the appropriate ODU address, you will be prompted by the SimRush ODU login page.
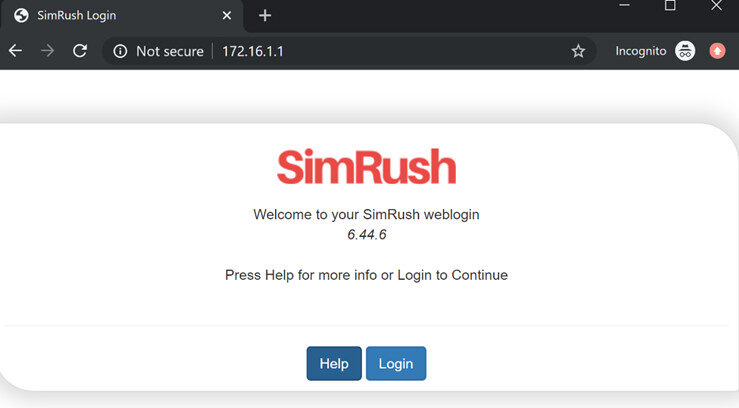
The “Help” button provides you with some useful explanations of the Signal Level acronyms
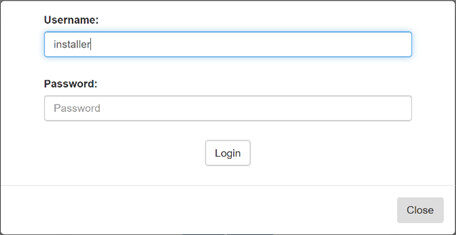
Next, Log into the unit by using either of the following credentials:
Username: installer
No Password: (Leave empty)
ODU Status Page
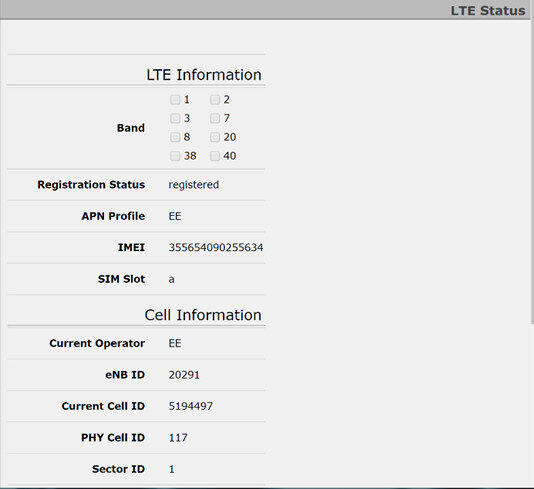
The default page once logged into the ODU is the Status page. This page offers you a quick overview with information about:
- LTE Information
- Bands
- Registration Status
- Current APN Profile
- IMEI of LTE card
- SIM Slot (Specific models only)
- Cell Information
- Current Operator
- eNIB ID (Cell Tower identifier)
- PHY Cell ID
- Current Cell ID
- Sector ID
- EARFCN (Band and Channel width)
- Access Technology
- Signal Information
- RSRP (Received Signal Power)
- RSRQ (Received Signal Quality)
- SINR (Signal in Noise Radio)
- CQI (Calculated Quality Index – LTE only)
- RSSI (Received Signal Strength Indicator)
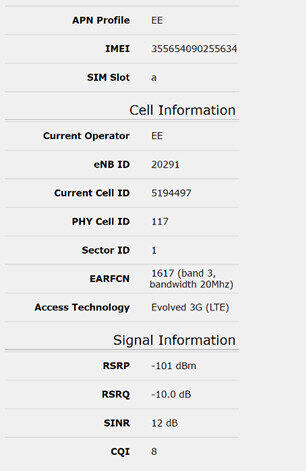
Move the ODU in 5 degree increments around all compass points. Once you see the peak signal, find the centre by moving away from clockwise until the signal drops and mark that point. Then move back past peak signal anti-clockwise until the signal drops again. Mark that point. Once you have these two points, align the ODU halfway between the two points to achieve the best results.
SINR and CQI are the key indicators to watch, the higher the SINR level the better the service. A minimum of ‘+5’ is recommended.
CQI is an overall quality index, it may or not appear on the page depending on the quality of the link. If it is indicated the higher the number the better the quality of the connection.
Add / Change APN
This section outlines the method to Add and Change the APN to another carrier.
⚠️ WARNING – This setting once applied to the LTE interface will cause the modem to reboot and reconnect, Do not attempt to do this remotely unless there is someone onsite to undo the change
When changing the APN, the SIM in the unit will require changing to the correct carrier you have selected
Adding a new APN
If you require to add a different APN from the 4 default ones (EE, Vodafone, O2 and Three) you can do so by the following method:
If you require to add a different APN from the 4 default ones (EE, Vodafone, O2 and Three) you can do so by the following method:
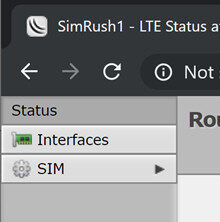
- Click on Interfaces on the left tab
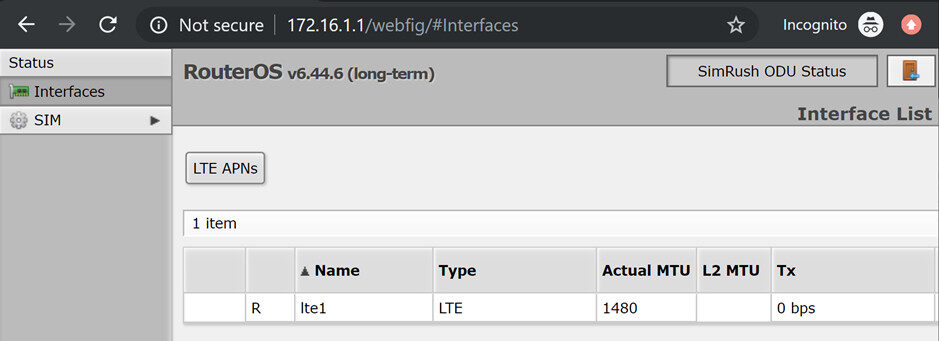
- Click on lte1
- Click Add New
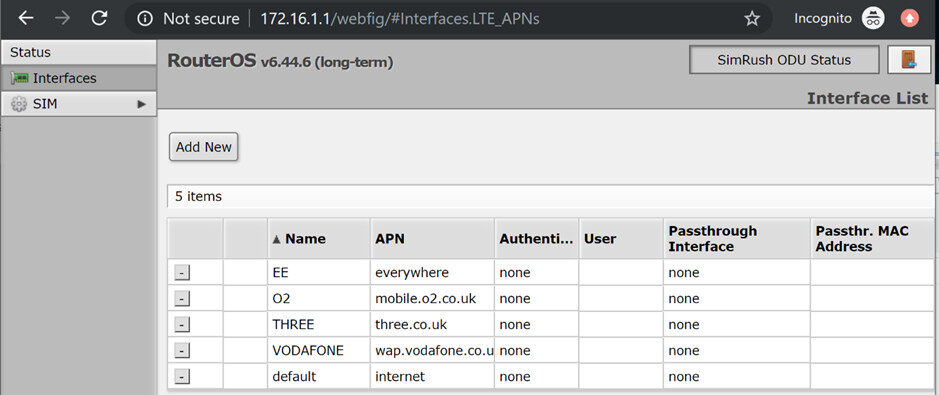
- Enter new APN details
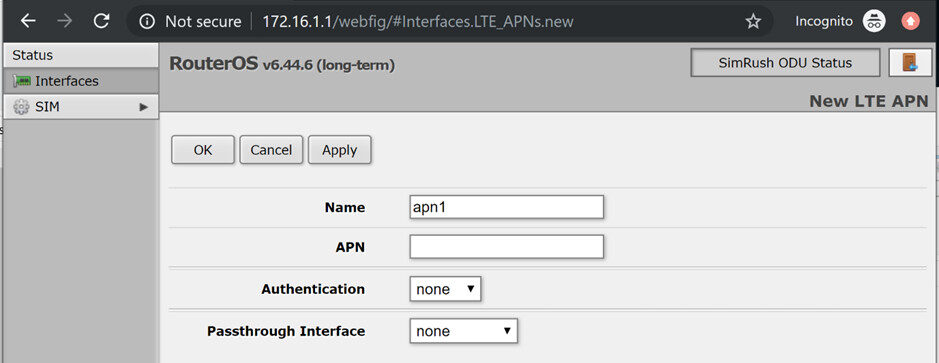
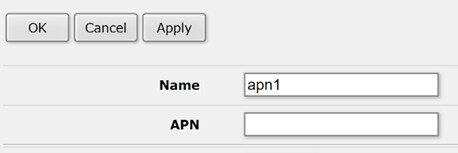
- Name – a friendly name, usually the name of the carrier
- APN – the APN provided by the carrier
- Authentication – Usually left as None, however check this with your carrier
- Passthrough Interface – Default is none
- Click Apply once finished
Change the APN
If you need to change the APN to another carrier, you can do so by the following method:
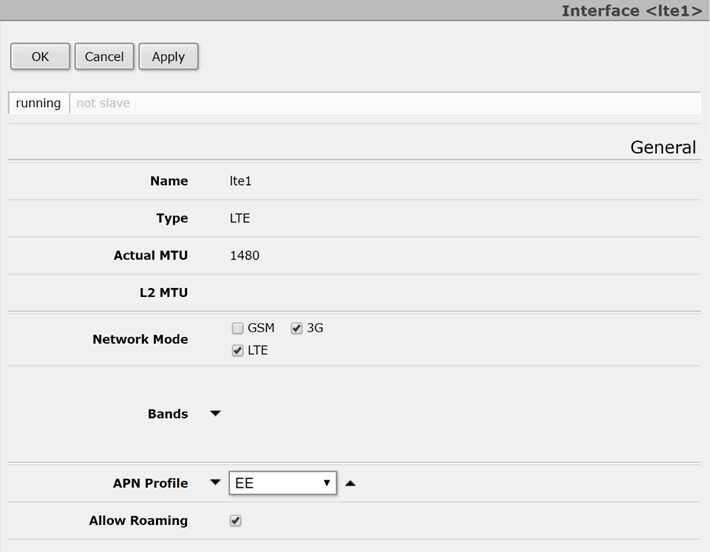
- Click on Interfaces on the left tab
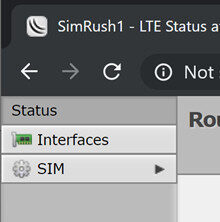
- Click on lte1
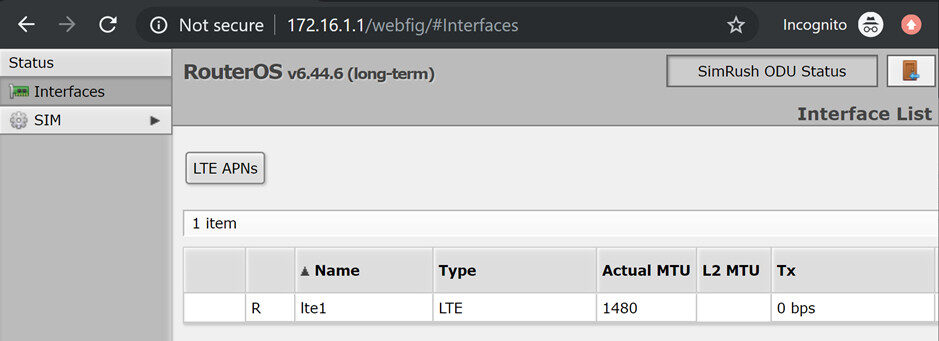
- Scroll to the section APN Profile, Click the down arrow to select the desired APN (Default is EE), Click Apply once finished
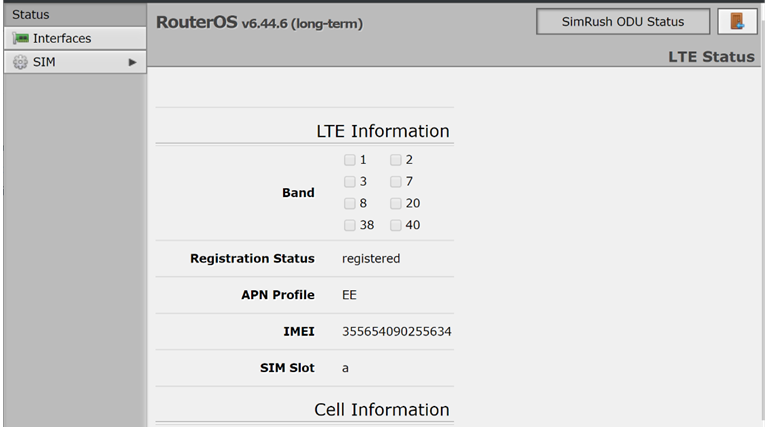
- Click on Status to check the current APN profile
- Unplug / turn off the power to the ODU and swap the SIM to the new carrier
SIM Slot switching
On supported models of ODU there may be 2 or more SIM slots available on the hardware. SimRush hardware automatically swaps SIMs if a SIM runs out of data for standard operation, there is no need to intervene. (The carrier on both SIMs must be the same for standard operation).
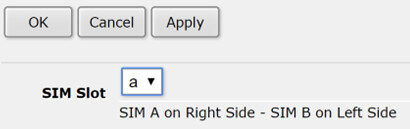
The Default SIM slot is SIM Slot A (generally on the Right side of the ODU under the cover)
If your unit has 2 SIM cards inside, you can swap between SIM Slot A and SIM Slot B within the SimRush ODU webpage. Generally, this is used for forcing a SIM swap between Tariff limited SIM cards from the same carrier, e.g. 120GB SIM in Slot-A and 200GB SIM in Slot-B.
For Resellers and installers, using a Demo unit, and wish to test two different carriers using the same ODU, please contact SimRush tech support to request that the automated SIM Slot failover script is disabled to allow for manual SIM Swapping. If you have SIM Slot A with Carrier-A and SIM Slot B with Carrier-B, you will be required to manually change the APN to match the active SIM in the Slot you are using.
- Click on SIM on the left menu bar
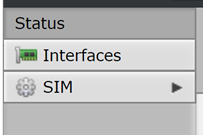
- Click on SIM Slot and then SIM Slot Setting
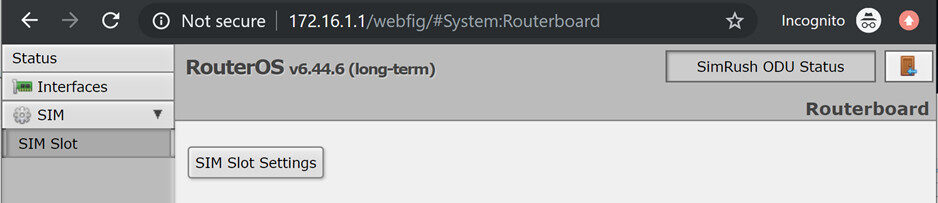
- This page displays the current SIM Slot (Default is a ), Click on the down arrow to select Slot a or b, then click Apply
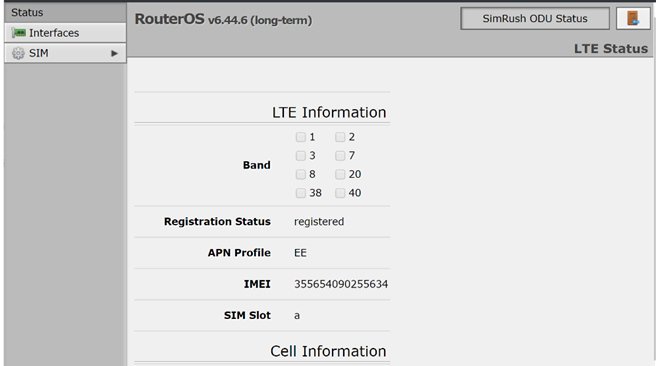
- Click on the Status tab on the left menu to view the current SIM Slot
Complete the Install
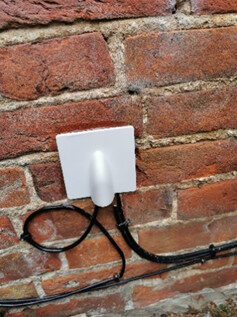
External: Fill external opening of drill hole with Silicone and add an external weather cover. Tidy any excess cable into a drip loop as shown and secure to the wall with cable clips.
Additional Steps
Do you have other equipment to connect to the internet?
Using ports 2,3, or 4 ONLY to connect your other devices Do not connect any other hardware to port 5, or the SimRush will not work.
Do you want to use another internet (WAN) connection as a Load-balancing or Failover?
Connect to Port 1 ONLY. It will not work with any other port.
If you wish to connect an existing internet router to the new service, the router must be giving out DHCP from address of 192.168.1.1/24 and connected to Ethernet port 1 (AUX1) on the SimRush device only.
By default, the SimRush will utilise both the SimRush LTE connection and the auxiliary broadband connection simultaneously in load-balanced mode. If you require a failover configuration instead, please contact SimRush support to make the adjust for you stating which WAN connection are desired to be primary and secondary.
Notes
To ensure your hardware warranty remains valid:
- Only use cat5e external grade cable provided.
- Always create drip loops as shown in the instructions to prevent water ingress.
- If you need to replace RJ45 plugs for any reason, ensure they are NOT booted.
- Login to SimRush SPanel and ensure your hardware is registered. Don’t have a login? Ask your supplier.
