Brief overview/intro of the hardware and the items required for setup.
What’s required to complete setup:
- 1.2a Power supply
- 3m ethernet cable
- SimRush hardware unit
- XXXXX
Instructions:
The process to pair these adaptors is relatively straight forward.
It’s easier when their close by for example you can pair them easier using a double socket which means you can have them both plugged in at the same time.
The devices do come pre-paired however if you need to re-pair them at any stage or if they come out of sync, follow the process below:
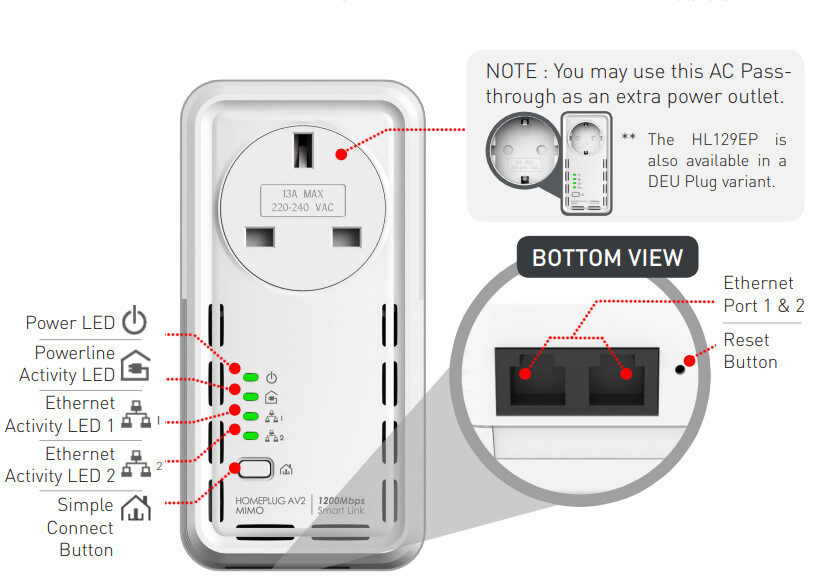
Device Button Overview
Pairing
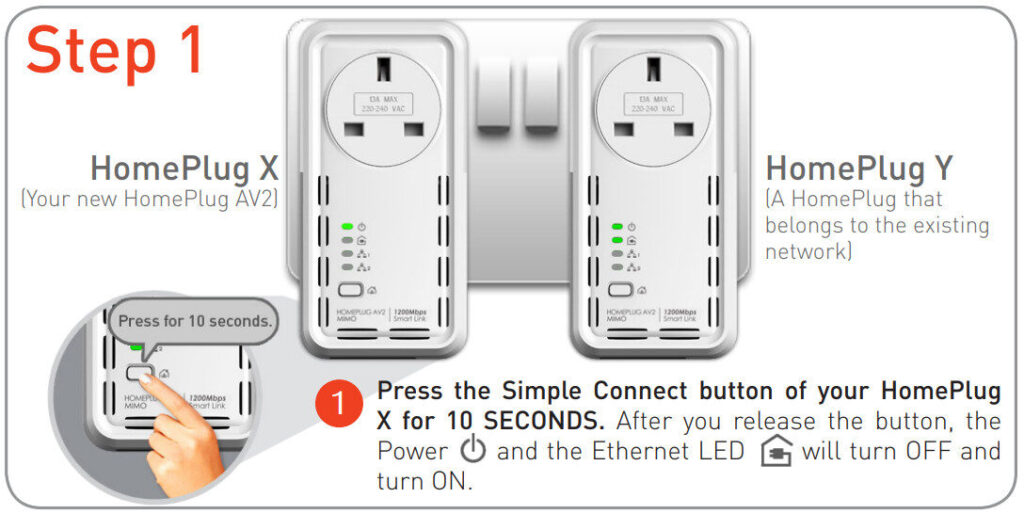
- On the first unit, press the Sync Button for 10s.
- The LEDs will go off and on again.
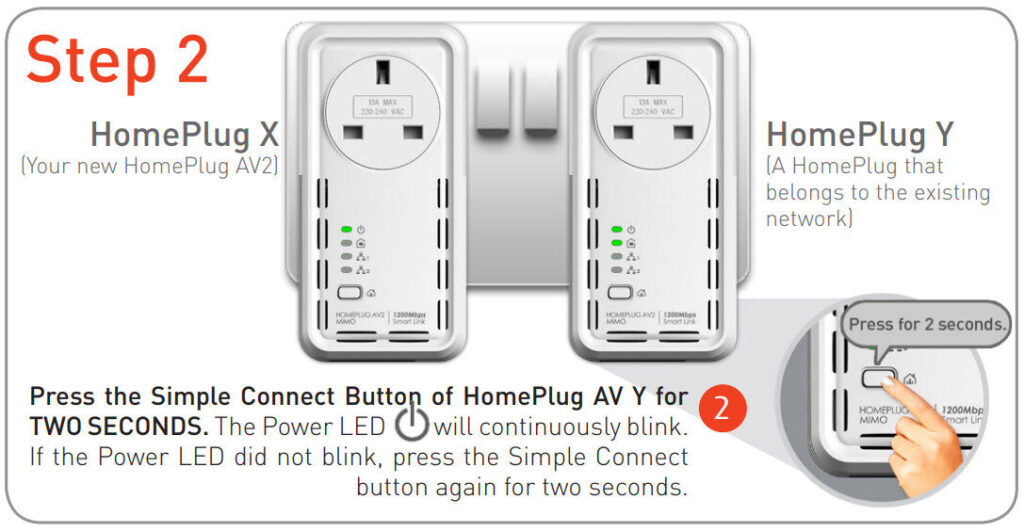
- On the second unit, press the Sync button for 2s.
- again the LEDs will flash briefly.
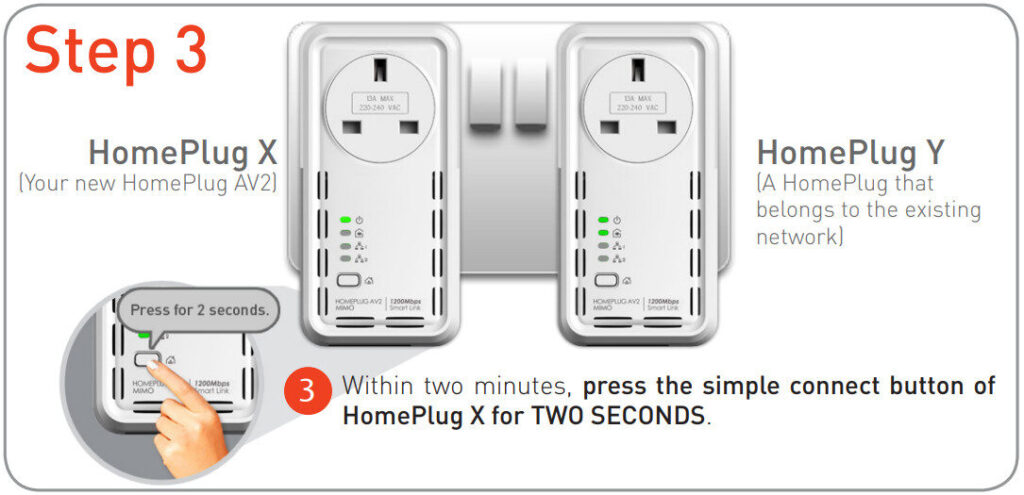
- Then go back to the first unit and press the Sync button for 2s
- The LEDs will flash, go off and come back on, the same pattern happens on the second unit.
- You then should see the Power Light and the “Home” icon light (top two) turn green.
- The units are now in sync ready for use.
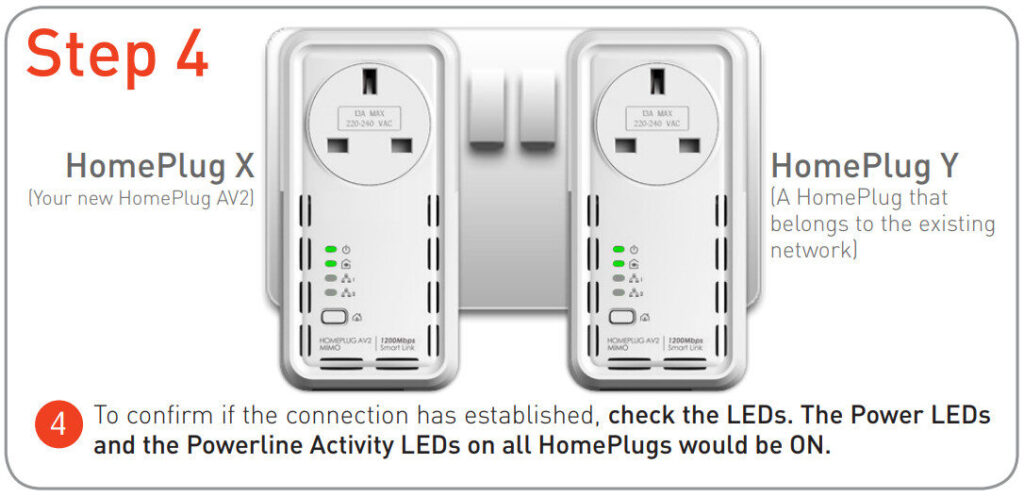
- ℹ️ When joining an existing network, you only have to pair it to one HomePlug AV that belongs to the existing network.
- ℹ️ The Ethernet Activity LED will only be lit if it is connected to an Ethernet device (e.g. computer, laptop, etc) through an Ethernet cable.
- ℹ️ To perform RESET to factory defaults, press the reset button for 3 SECONDS (on the under side next to the Ethernet port).
Setup
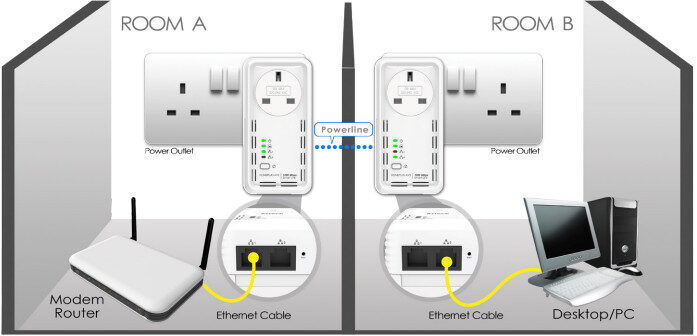
Once the units are in sync, they can now be placed where required.
- Plug the first unit where the main controller is and connect an ethernet cable connected between the white powerline and the controller.
- The powerline does have a Power Pass-through so you can reuse the same socket.
- Once the first plug is in place you can position the second unit of the pair where it is required
Device Connection Rate
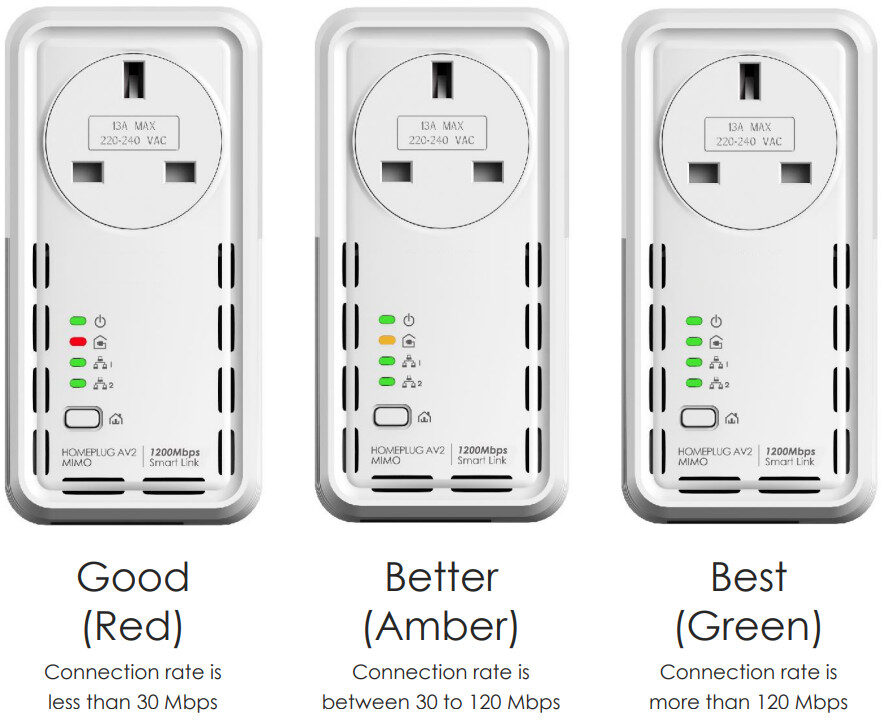
⚠️ Please note that the power line units must be within the same Consumer unit (fuse box) and ideally on the same ring main for best results. Check the “Home” LED as an indicator.
