⚠️ Warning! This installation requires working at height. Ensure the install is only completed by a person who is competent at working at height
ℹ️ Make a note of the serial numbers of all equipment before commencing the install. Serial numbers are in the format of long-uppercase hexadecimal number prior to the ‘/’ and 3 digits. These are a reference to production dates and not part of the serial number itself.
Check you have the correct equipment
1. Your SimRush Hardware Base Pack. In the example is shown below is a “SimRush Pro-WiFi 5G” but this will vary depending on the model you have purchased, check your order and dispatch note. In most cases it will consist of 2 hardware devices: the external “SimRush ODU” and the internal “SimRush Controller”
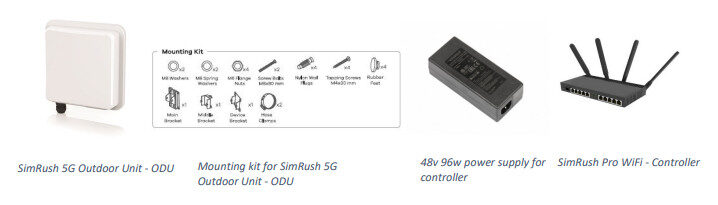
- A Self-Installation pack containing (colours may vary):
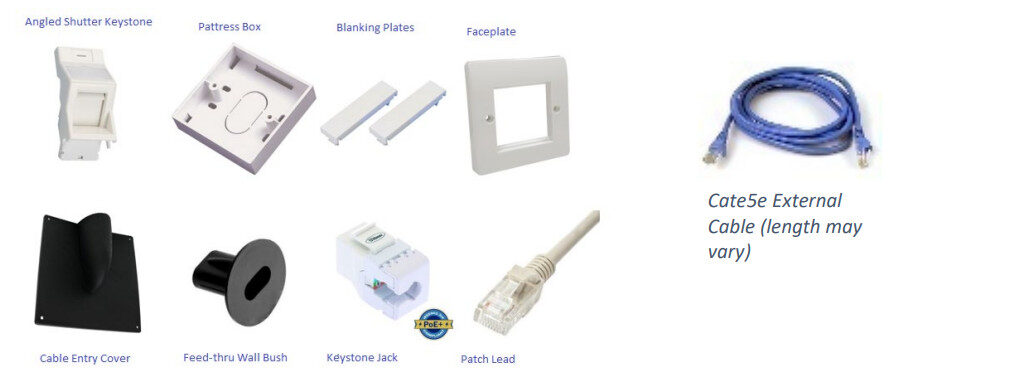
- A live data SIM. This must be active and have a minimum of 2Gb of data for testing.
- Additional mounting bracketry may be required (e.g. a 2 inch pole) these will need to be purchased separately.
Determine the external location for the SimRush ODU
- Plan the optimum location for your Outdoor Unit to be placed. The location you choose for your outdoor device can have a huge impact on its performance. To ensure the best speeds possible ensure:
- The ODU is facing the closest transmitter of your SIM’s carrier.
- Your chosen location is suitable to have a 2 inch pole attached to it, or the surface is durable enough for the 5G ODU to be mounted to it (e.g. Exterior wall)
- Clear line of sight between ODU and transmitter where available. Avoid Buildings, walls, rooflines, metal, double glazing where possible. Consider signal height, reflections & obstructions.
- If you have a smart phone you can download the OpenSignal App to identify the direction of the nearest mast with the carrier you are using (You must be using a phone with the same data carrier as the Sim in the ODU)
Android – Download the app from Google Play Store “OpenSignal” Opensignal – 5G, 4G Speed Test – Apps on Google Play
iOS – Download the app from Apple Store “OpenSignal” Opensignal Speed Test Ad Free App – App Store
Determine the Internal Location for the SimRush Controller
The SimRush Controller needs to be placed near to a power outlet.
We suggest you locate the SimRush Controller in a living room, office or other space where you will want use the WiFi mostly. If you want to extend your WiFi coverage later you can purchase additional SimRush devices to do that.
Plan the cable route from the ODU to the Controller, the maximum route cannot exceed 40 meters in cable length. For cable runs of 40-90 metres please see our support pages for further information.
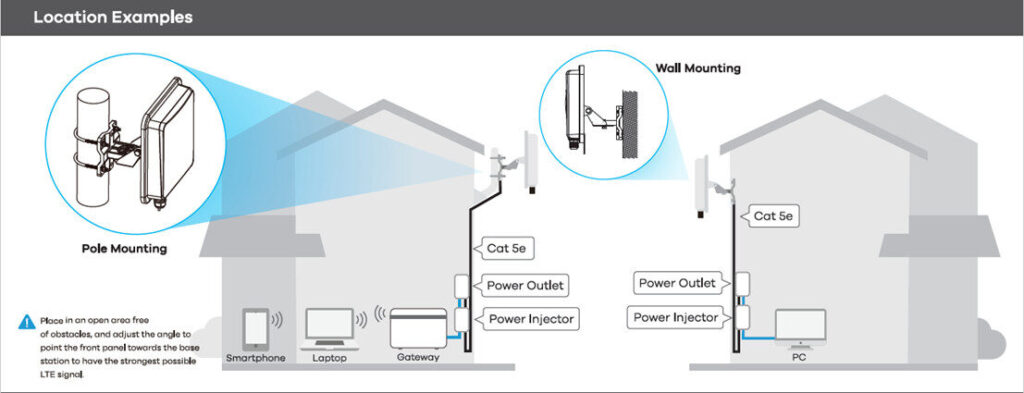
ℹ️ Remember: the cat5e cable will need to pass from the outside of the premises to the inside so you will need to locate or create a suitable entry point into the building for the cat5e cable to pass through. (If you need to drill a hole for the cable to pass through ensure it is 10mm diameter minimum.
Preparing and mounting the ODU
⚠️ Warning! This part of the installation requires working at height. Ensure the install is only completed by a person who is competent at working at height.
SIM Card Installation
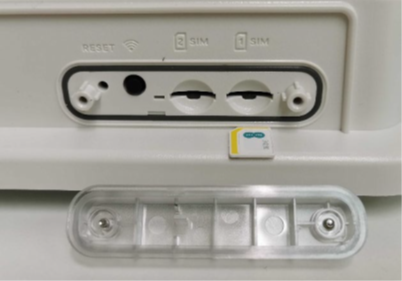
Ensure the unit is powered off and no Ethernet cable is connected to the unit. Unscrew the SIM card slot cover and remove it.
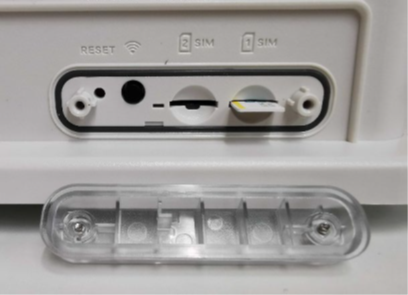
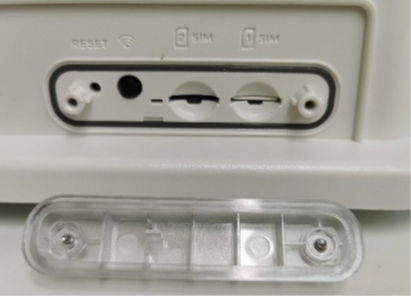
Cable Connections
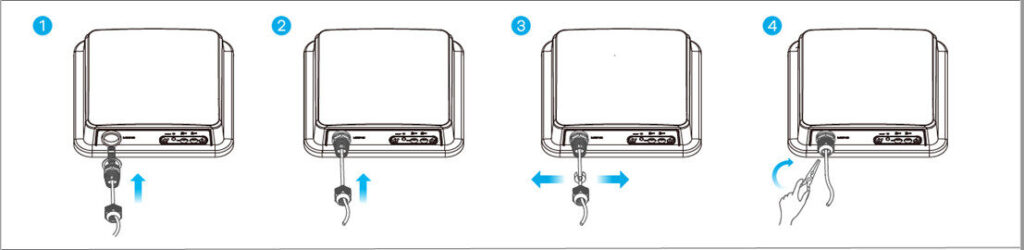
Using the cable gland provided in the 5G ODU Box connect up an 8-pin CAT 5e Ethernet cable, as shown in steps 1-4 below:
Preparation for Pole/Wall Mounting
Connect the M Bracket provided in the 5G ODU box (refer to 5G ODU QuickStart guide) to main frame of the 5G Outdoor unit as per steps 1-5 detailed below:
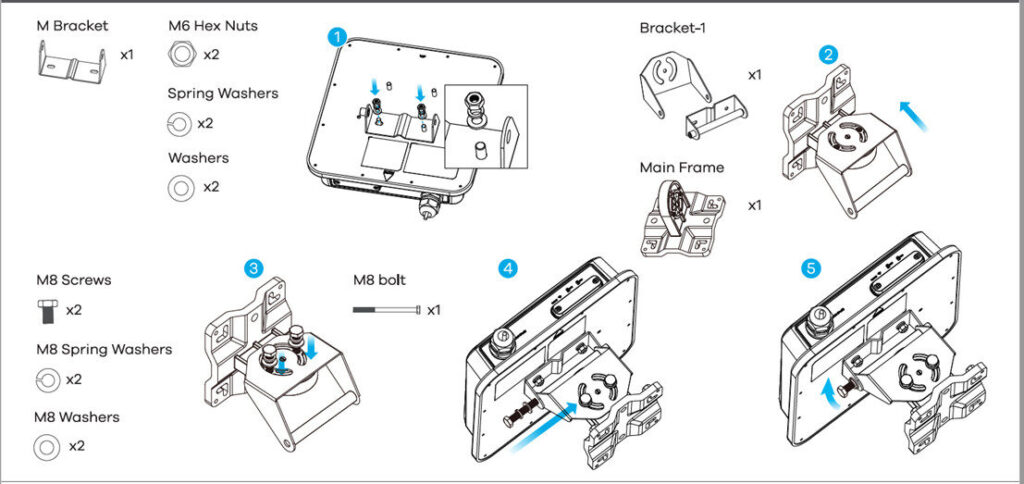
Step 1 – Use washers, spring washers, and nuts to attach the M-type bracket to the back of the unit.
Step 2-3 Follow diagram steps 2-3 above to attach the rotating bracket to the main mounting frame using MB Screws, washers, spring washer and hex nuts. DO NOT tighten the nuts until you adjust the mounting angle in the final step.
Step 4-5 – Follow diagram steps 4-5 above to align the rotating bracket with the M-type bracket, insert the M8 bolt through the holes and use washers, spring washers and nuts to secure it.
Wall Mounting
Step 1 – Use the four corner holes of the main frame to mark holes on a wall. Drill four holes in the wall where 5G unit will be mounted
Step 2 – Insert the screw anchors and screws into the holes.
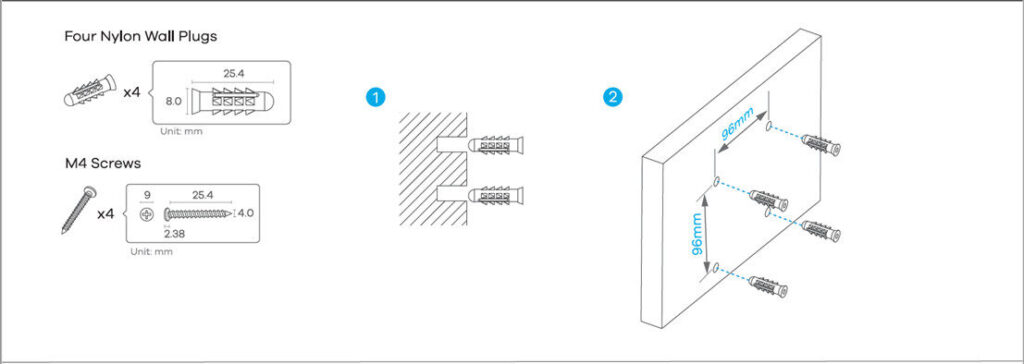
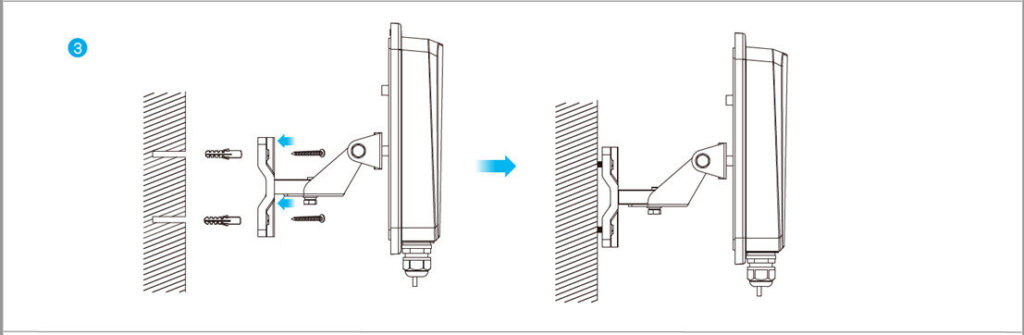
Step 3 – Insert nylon wall plugs into the wall. Use mounting screws to secure the main frame to the wall through the nylon plugs.
Pole Mounting
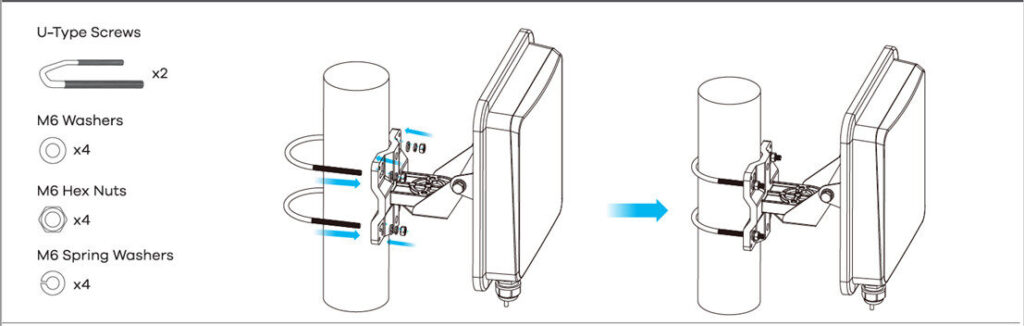
Place the U-bolt around a pole. Insert the U-bolt into the holes on the main frame. Use a wrench to secure the main frame to the pole with the washers, spring washers and nuts.
External Cable Run
- Ensure there is a small coil of excess cable remaining near to the ODU to create a ‘drip loop’
- Secure the cable from the end of the drip loop section along / down the building to the external entry point. we recommend fixing the cable every 45cm.
- Insert the un-terminated end of the cat5e cable through the external entry point and go inside the premises to pull it through.
- Before securing the last external cable fixing, make sure you have a ‘drip loop’ to prevent water ingress.
Internal Cable Run
- Attach the pattress box to the wall over the hole where the cat5e cable enters the premises, or if the cabling requirement extends further into the property use standard cable clips to run the cable around the walls to the desired location and enter the Pattress box from the side or base, removing cable entry blanks on the Pattress box as desired.
- Cut the cable to the desired length, be sure to leave enough cable so that you can strip back the outer sheath without damaging the internal cores.
- Use the tool-less Keystone Jack to terminate the cable.
- Attach the shutter any blanking plates as required to faceplate.
- Attach the keystone jack to the shutter
- Screw faceplate to pattress box attached to the wall to create your new socket.
- Connect your ethernet patch lead into the new socket.
Connecting the ODU to Controller
Visit Quickstart Guides section to get the correct cable guide for your controller.
Align the ODU
The directional antenna in the SimRush 5G ODU is highly sensitive and minor adjustments in its position can make a huge impact on its performance. To assist in selecting the fine optimal alignment of the direction of the SimRush ODU once you have both the 5G ODU and controller in place, please call our support engineers who can then work with you to fine align your 5G Outdoor unit.
ℹ️ Please note this may involve going up and down a ladder to return to the positioned 5G ODU to make any adjustments required.
Complete the Install
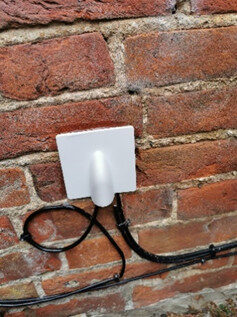
External: Fill external opening of drill hole with Silicone and add an external weather cover. Tidy any excess cable into a drip loop as shown and secure to the wall with cable clips
Notes
To ensure your hardware warranty remains valid:
- Only use cat5e external grade cable provided.
- Always create drip loops as shown in the instructions to prevent water ingress.
- If you need to replace RJ45 plugs for any reason, ensure they are NOT booted.
- Login to SimRush SPanel and ensure your hardware is registered. Don’t have a login? Ask your supplier.
- Do Not use the reset button on the 5G Outdoor Unit. If the reset button is used on the 5G hardware the system will lose all of it’s bespoke configuration and will be dropped from our network. If the reset button is pressed the hardware will have to be removed and returned to our office for re-programming and this will be chargeable.
