The PWR-Line Pro allows Ethernet-like connectivity between supported devices over regular electrical power lines.
When plugged into the same electrical circuit, the device will establish Ethernet connectivity by using the HomePlug AV 2 standard.
PWR-LINE PRO does not require any system software or configuration, it’s ready to use.
ℹ️ A minimum of 2 Powerline modules are required to work with a maximum of 8 supported.
Note that it is advised to remove any other powerline technology which is not required.
⚠️ It is recommended to plug the device into the main wall socket for best results. Avoid using power strips where possible – specifically Surge protected power bars.
Instructions:
The units come pre-paired for the number you have purchased. If you need to re-sync or add additional devices, see the guide below.
Connecting
- Plug one PWR-Line Pro device into a power socket.
- Connect to one of the LAN ports of your SimRush Controller to the PWR-Line Pro Ethernet port.
- Plug another PWR-Line Pro unit (or any other compatible device) somewhere in the same electrical circuit.
- Use the sync button to connect the devices and your local network will automatically be extended.
Please see PWR connection button (sync) section on how to pair additional PWR-Line Pro devices. - PWR-Line Pro supports PoE out from Ethernet port to power another SimRush AP device, this can be activated with a switch, please see LED lights and PoE switch section.
Mounting
PWR-Line Pro can be mounted on the wall using four provided screws:
- To access mounting points, remove a centre screw, that is holding top cover, using PH2 screwdriver.
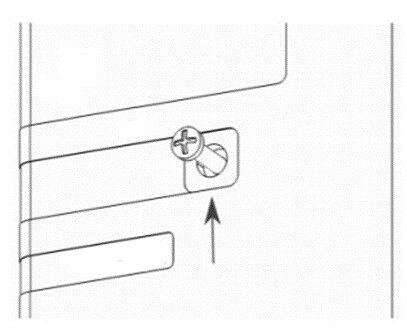
- Mark four points for screw holes in the desired place on the wall for PWR-LINE PRO.
- Drill using 5 mm drill bit for dowel holes and insert them by slight tapping if necessary.
- Mount PWR-Line Pro and close top cover, centre screw tightening force 0.5 – 0.7 Nm, attach provided 3M sticker to cover centre screw.
The IP rating scale for this device is IPX0.
When mounting indoors, please ensure that cable feed is pointing downwards. We recommend using shielded Cat5 / Cat6 cables.
Powering
The device accepts powering directly from 100-230 V AC , ~50/60 Hz wall socket it is plugged into.
The power consumption under maximum load can reach 5 W. Max power consumption with PoE-Out 14 W.
In order to reach a speed of 600 Mbps, your electrical sockets need to be grounded.
To connect with another PWR-Line device, both need to be on the one electrical phase.
Ports
One Gigabit Ethernet port, supporting 24 V PoE output by default settings is set to OFF.
Buttons and Jumpers
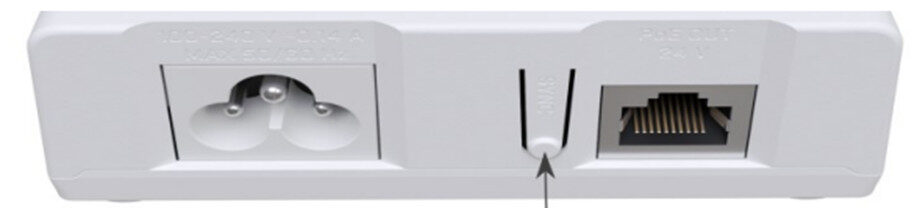
- Hold 0.5 – 3 seconds. For 120 seconds it will try to communicate with another PWR-Line Pro device.
A blinking amber LED light indicates that it is in search mode. You must also do the same on the other PWR device so they can synchronize. Press button again to cancel the search. - Hold 5 – 8 seconds. A new security key is generated. This is needed to remove a PWR-Line Pro device from an existing PWR network.
- Hold 10 – 15 seconds. Resets all PWR related settings.
- If you have issues with pairing the device, hold the SYNC button for 5 – 8 seconds to generate new network key and then re-attempt to pair it in PWR-Line Pro network again holding SYNC button for 0.5 – 3 seconds.
LED lights and PoE switch
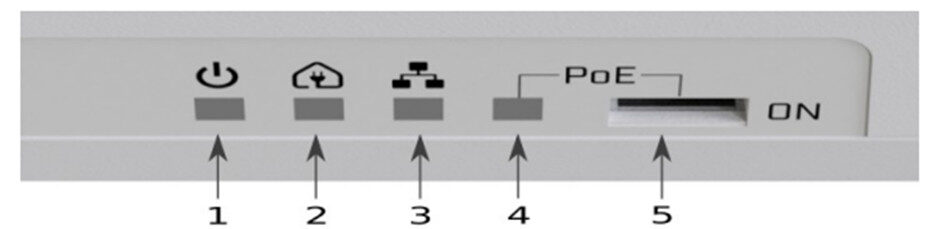
- Blue LED indicates device power ON state.
- Amber LED indicates that the device is paired, blinking amber indicates that the device is in search mode.
Search mode can be activated by the sync button. Please refer to the PWR connection button (sync) section. - Green LED indicates Ethernet port connectivity.
- Red LED indicates that PoE is active.
- PoE switch by default settings is set to OFF. A standard ballpoint pen can be used to switch positions.
The Red light will indicate that PoE is active.
Cable guide
Controller or Access point unit(s) may vary from that of image, however the general setup is the same.
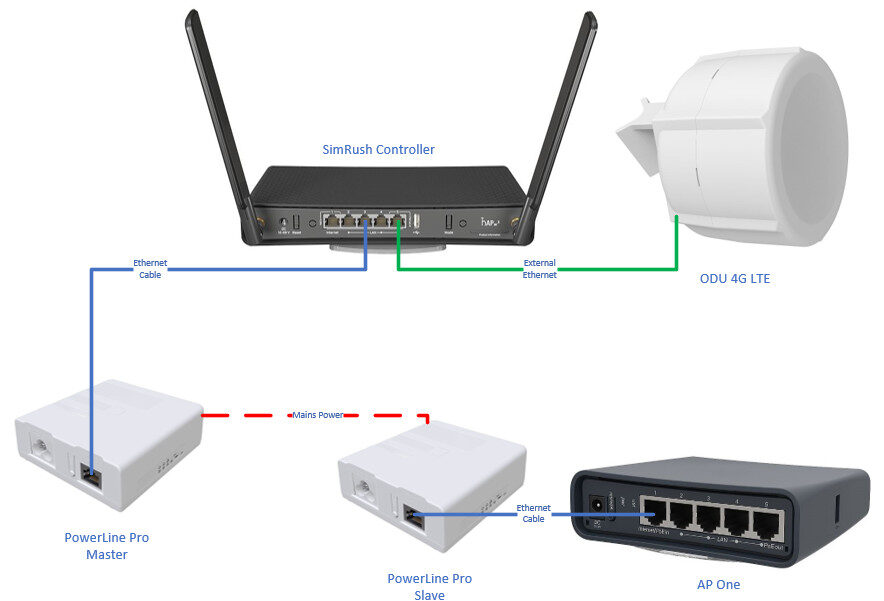
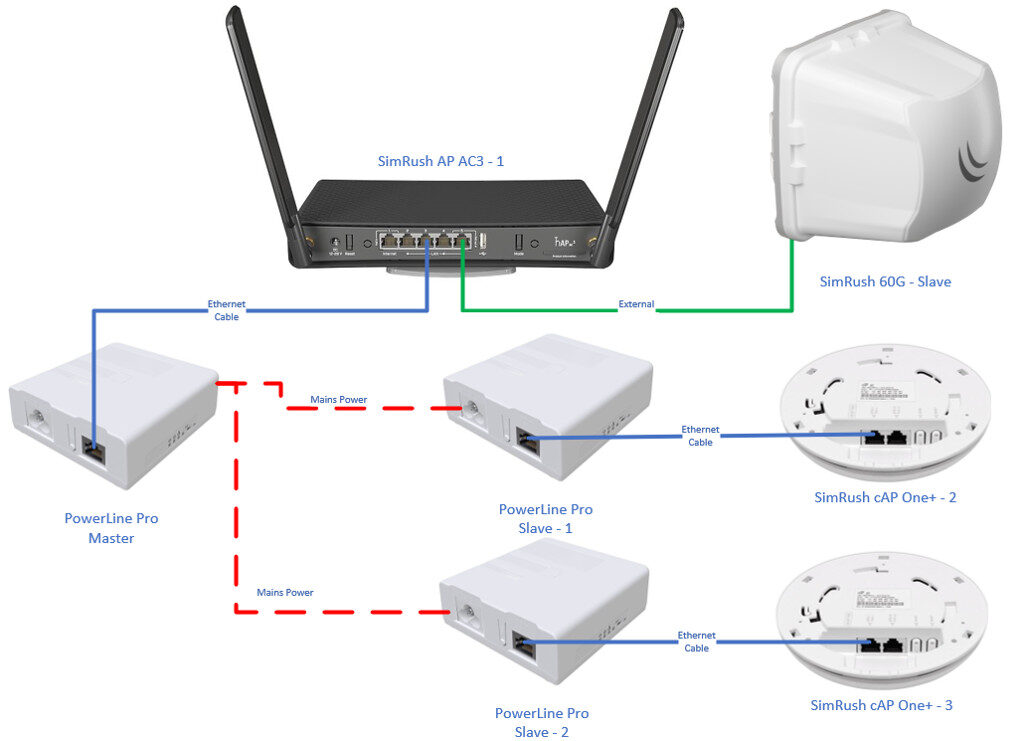
SimRush Controller with ODU and Access point
SimRush AP over 60G link for additional Access Points
